


All tooled up
17/01/10

Knowledge
First and foremost, you need to be competent and confident about working on vehicles. You will be working on bodywork, engine, fuel system, cooling system, and electrics — if there's any of that you aren't comfortable with then you either need to stop or get assistance.
Next you'll need to be familiar with the UKLPG (formerly LPGA) Code of Practice No 11 Autogas Installations No 11 Autogas Installations. I couldn't possibly comment on whether there might be a copy findable via an internet search engine.
You will need sufficient information about the vehicle in order to find all the electrical circuits you'll need to connect into, the right coolant pipes to tap into, and so on. You will also need the instructions for the LPG equipment — this normally comes with the kit but not always as some manufacturers assume it's going to be fitted by someone that has been on their course and/or has their technical manuals.
Mechanical
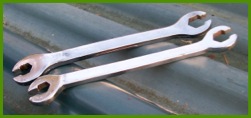
Well, it goes without saying that you'll need various workshop power and hand tools — spanners, drills, files, etc. To a certain extent, there is a tradeoff since (for example) a lack of a welder simply means you'll have to use ingenuity to avoid the need to weld brackets together.
A vehicle lift (2 or 4 post), or at least a pit, is very useful for some of the work. If fitting tanks underneath, then a vehicle lift and transmission lift is highly recommended — I can tell you from experience that lying on your back while trying to manoeuvre a heavy gas tank (or set of tanks) into place can be hard work.
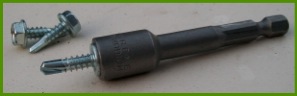
You will have to cut a hole for the filler, or make a bracket if mounting it on the tow-bar for example. The filler points require a sizeable hole, and a ‘Q-max’ cutter that size isn't cheap. Alternatives include stitch drilling and filing, or careful work with nibblers. I have seen a nibbler that goes in a drill (such as this one from Sealey)and can nibble freeform, but I've never used one.
You need a means of mounting the tank — this can be as simple as drilling two holes for a spare wheel well mounted tank, or at the other extreme fabricating a frame requiring the ability to cut steel sections, possibly bend them, and weld them together.
Similarly, you may need to make brackets for vapourisers, injector units, electronics modules, etc. At it's simplest this may mean bending some flat strip and drilling holes, or it may involve welding some bits together.
Plumbing
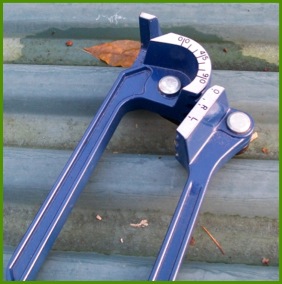
You'll need some tools for working with 6mm and 8mm copper pipe, plus various sizes of plastic/rubber pipe.
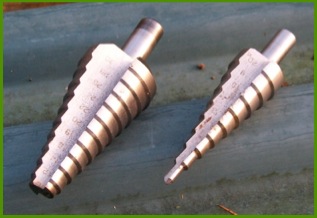
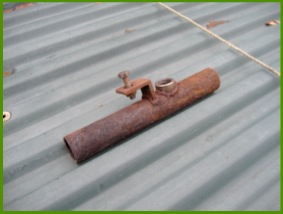
For cutting copper pipe I recommend a small wheel type cutter (as shown at top of page) — it's quick and mess free. You can use a fine hacksaw, but then you need to clean up the pipe end and clear the cuttings from the pipe so they don't block anything.
For plastic and rubber pipes you can buy a cutter (similar to gardening secateurs) such as these from Laser Tools, but for the limited amount I do I've managed with a sharp knife (and the nouse to keep my fingers out of the danger zone). A pair of hose clamps such as these from Laser Tools can be useful to minimise coolant loss while you are tapping into the pipes.
Joints in the high pressure side of the gas system usually fall into two types — flared fittings and compression fittings.
Flared pipe ends are commonly found on 4 hole tanks, and require you to form a flare on the 6mm copper pipe. I've only had to do this once (on my Disco) and took the pipe down to the local garage who had a professional tool. You can buy inexpensive flaring kits such as this one from Sealey which should do the job as long as you are careful to get it straight. TIP – don't forget to put the nut on the pipe before making the flare unless those around you enjoy colourful language !
Rubber pipes for low pressure gas, and water, can be fixed with worm drive clips (commonly called Jubilee clips, though that's a trade name of one specific brand) or ‘squeezy ear’ pinch clips. Worm drive clips are best done with a flexible driver with hex socket on the end, or they can be done with a screwdriver. The ‘squeezy ear’ type are just nipped up with side cutters or pincers — they look neater but are harder to remove so make sure you get things right before tightening.
And lastly, don't forget a can of leak detector.
Electrical
Many kits will come with a packet of terminals, fuse holders, etc. Even so, you may need others (such as ring terminals for earths and battery connections) and these should be of the uninsulated variety.
Terminals should be crimped onto the wires, and so you'll need a crimping tool although for small quantities you can ‘make do’ with some small pliers. NOTE – I do not advocate using anything but a good tool for crimping terminals where it will be the only means of connection (the cheap flat plier type sold for insulated terminals don't count in my book).
For the LPG system, all connections should be soldered, so having crimped the terminal, you'll need a soldering iron and solder. Let the terminal cool after soldering before crimping the strain relief onto the sheath.
You'll need a selection of grommets where cables pass through panels etc, and cable ties to fix everything into place. If you really want it to look like it's supposed to be there then cable sleeving and/or loom wrapping tape are needed — loom tape is like electrical insulation tape but without the sticky side, it gives a more flexible loom than using sticky electrical tape.
Setup and Diagnostics
First of all you'll want a general purpose multimeter — this is useful for all sorts of jobs like checking for shorts before putting the power on, through to checking for voltages when commissioning or troubleshooting the system.
For all but the most basic systems, you will need a computer. Ideally this should be a portable (i.e. laptop), and in many cases it needs to be an old one with a real serial port. It appears that while some software will work with some USB to serial adapters, this isn't always the case. And of course, you will need the software that goes with the LPG system you are working with.